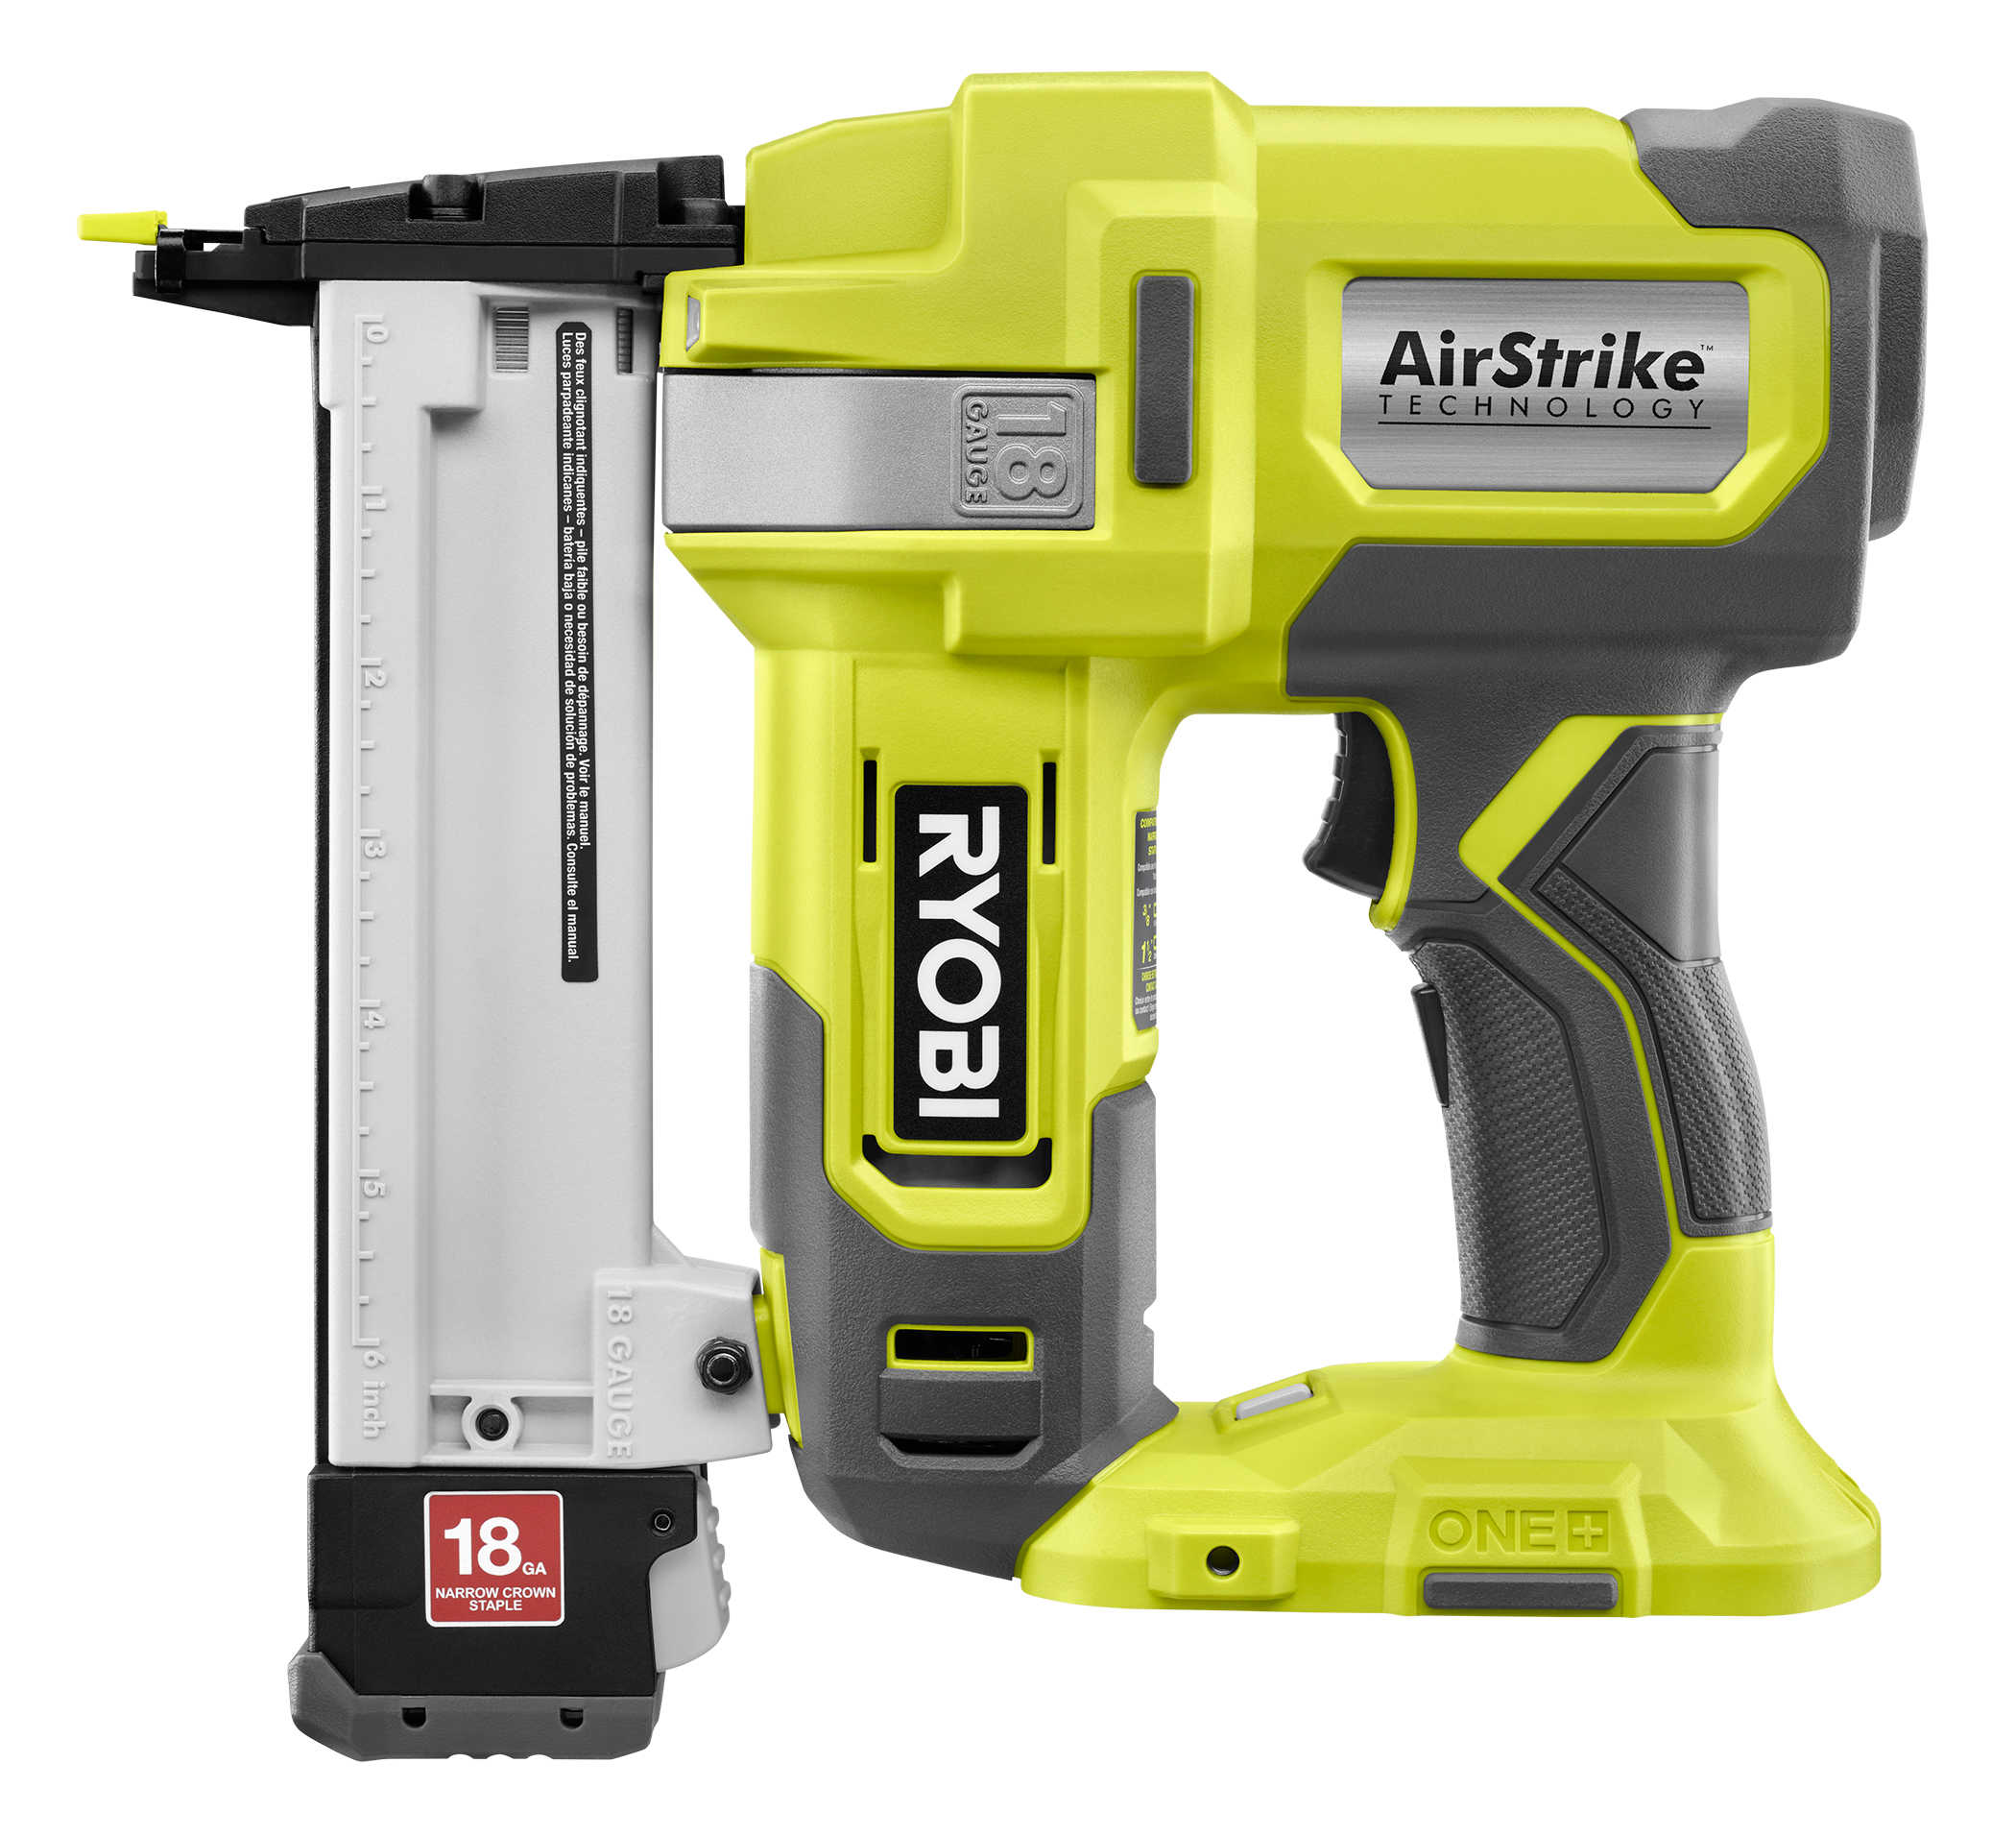
Ryobi Flooring Stapler
If you’re planning a hardwood flooring project, choosing the right tools is just as critical as selecting the flooring material itself. One tool that stands out in both performance and value is the Ryobi Flooring Stapler. Known for its user-friendly design, reliability, and affordability, this stapler is perfect for both DIY enthusiasts and professional contractors.
Ryobi Flooring Stapler: The Ultimate Tool for Your Flooring Projects
If you’re planning a hardwood flooring project, choosing the right tools is just as critical as selecting the flooring material itself. One tool that stands out in both performance and value is the Ryobi Flooring Stapler. Known for its user-friendly design, reliability, and affordability, this stapler is perfect for both DIY enthusiasts and professional contractors.
In this comprehensive guide, we’ll cover everything you need to know about the Ryobi Flooring Stapler, including its features, benefits, usage tips, customer reviews, comparisons, and why it’s a must-have tool for anyone installing wood floors.
What is a Flooring Stapler?
A flooring stapler is a specialized pneumatic or manual tool designed to secure hardwood or engineered wood flooring to a subfloor using staples or cleats. It ensures a snug, secure fit and eliminates gaps or misalignment. Unlike standard staplers, flooring staplers are built to drive fasteners at an angle—typically 45 degrees—through the tongue of a floorboard.
Introducing the Ryobi Flooring Stapler
Ryobi, a well-known name in the power tool industry, brings you a flooring stapler that combines precision engineering with ease of use. The Ryobi Flooring Stapler offers efficient stapling action, high compatibility with flooring sizes, and a durable construction that ensures long-term usage.
Product SKU: RYOBI-FS-001
Product Type: Pneumatic Flooring Stapler
Compatible Flooring Types: Solid hardwood, engineered wood
Fastener Type: Staples and cleats (15.5-gauge and 16-gauge)
Key Features of the Ryobi Flooring Stapler
Here are the standout features that make this stapler a top pick:
1. Ergonomic Design
The stapler comes with a soft-grip handle, reducing fatigue during long flooring sessions. It is lightweight and well-balanced, making it ideal for extended use.
2. High Compatibility
This tool is compatible with both 15.5-gauge staples and 16-gauge cleats, allowing you to use whichever fastener suits your project.
3. Adjustable Base Plate
The adjustable base plate allows you to switch between different flooring thicknesses (1/2″ to 3/4″) quickly and easily.
4. No-Mar Pad
Worried about damaging your new hardwood flooring? The included no-mar pad prevents scratches and dents during stapling.
5. Pneumatic Efficiency
The Ryobi Flooring Stapler runs on compressed air (70–120 PSI), delivering consistent driving power with minimal effort.
6. Quick Jam Release
The quick-release mechanism allows you to remove jammed staples or cleats without disassembling the tool, saving you valuable time.
Benefits of Using the Ryobi Flooring Stapler
✅ Increased Productivity
Thanks to its pneumatic operation and ease of use, you can install flooring faster compared to manual staplers.
✅ Professional-Grade Finish
The angled driving action ensures tight seams and flush finishes—just like the pros.
✅ Cost-Effective
Compared to higher-end flooring staplers, Ryobi offers outstanding value for money without compromising quality.
✅ Great for DIY and Pros
Whether you’re a weekend warrior or a seasoned contractor, this tool is user-friendly enough for beginners yet durable enough for professionals.
✅ Low Maintenance
With minimal moving parts and a reliable build, this stapler requires little upkeep—just regular oiling and cleaning.
How to Use the Ryobi Flooring Stapler: Step-by-Step
Using the Ryobi Flooring Stapler is simple and straightforward. Here’s a step-by-step guide:
Step 1: Prepare Your Workspace
-
Clear the subfloor
-
Ensure proper underlayment is installed
-
Lay out your hardwood boards for acclimatization
Step 2: Load Staples/Cleats
-
Use the correct gauge of staples (15.5 or 16) as recommended for your flooring type
-
Open the magazine and insert fasteners
Step 3: Connect to Compressor
-
Attach the stapler to your air compressor using a standard air hose
-
Adjust the pressure between 70–120 PSI
Step 4: Position and Fire
-
Align the stapler with the tongue of the board
-
Strike the actuating cap with a rubber mallet (included)
-
The staple or cleat will be driven in at an angle
Step 5: Move Along the Row
-
Continue placing boards and fastening until the entire floor is complete
Step 6: Final Touches
-
Use a finish nailer or manual method for tight spots near walls
Specifications
| Feature | Specification |
|---|---|
| Tool Type | Pneumatic Flooring Stapler |
| Fastener Gauge | 15.5-gauge staples and 16-gauge cleats |
| Operating Pressure | 70–120 PSI |
| Flooring Compatibility | 1/2″ to 3/4″ hardwood/engineered wood |
| Magazine Capacity | 100 fasteners |
| Weight | 7.2 lbs |
| Warranty | 3-Year Manufacturer Warranty |
What’s in the Box?
-
1 x Ryobi Flooring Stapler
-
1 x Mallet (rubber head)
-
1 x No-mar base pad
-
1 x User Manual
-
1 x Wrench & Oil bottle
Why Buy the Ryobi Flooring Stapler from Our Store?
When you purchase the Ryobi Flooring Stapler from our WooCommerce store, you enjoy the following perks:
-
✅ Competitive Pricing
-
✅ Free Shipping on orders over $99
-
✅ Fast Delivery within 2–5 business days
-
✅ Secure Payment Options (Credit Card, PayPal, Apple Pay)
-
✅ Customer Support available 24/7
Buy now and take the stress out of your next flooring job!
Customer Reviews
⭐⭐⭐⭐⭐
John D. – Verified Buyer
“This tool made my first hardwood flooring project a breeze. Easy to use and jam-free.”
⭐⭐⭐⭐⭐
Marta L. – Home DIY Enthusiast
“Very sturdy and does exactly what it promises. The included mallet was a great touch!”
⭐⭐⭐⭐
Ron K. – Contractor
“I use this for quick fixes and small projects. It holds up well under moderate use.”
Ryobi Flooring Stapler vs. Competitors
| Feature | Ryobi Flooring Stapler | Freeman PFL618BR | Bostitch BTFP12569 |
|---|---|---|---|
| Price | Affordable | Moderate | Premium |
| Compatibility | 15.5 & 16-gauge | 16 & 18-gauge | 15.5 & 16-gauge |
| Ease of Use | Very High | High | Moderate |
| Best for | DIY & Light Pro | Professional Use | Heavy-Duty Use |
| Warranty | 3 Years | 7 Years | 7 Years |
While some professional-grade tools offer additional features, Ryobi provides the best value for casual users and semi-professional contractors.
Maintenance Tips
To keep your stapler in top shape:
-
Oil regularly – Use pneumatic tool oil before each use.
-
Clean the magazine – Remove any dust or debris to avoid jams.
-
Inspect seals – Check O-rings and fittings periodically.
-
Use correct PSI – Too much pressure can damage the tool.
-
Store properly – Keep it in a dry place to avoid corrosion.
FAQs (Frequently Asked Questions)
❓ Can the Ryobi Flooring Stapler be used for laminate flooring?
No. Laminate is typically floated or glued, not stapled. Use this tool only for solid hardwood or engineered wood.
❓ Is an air compressor included?
No, an air compressor is not included. You’ll need a separate pneumatic air compressor rated at 70–120 PSI.
❓ What is the warranty?
This product comes with a 3-Year Limited Warranty from Ryobi.
❓ Does it work with tongue and groove flooring?
Yes. This stapler is specifically designed for tongue and groove installations.
❓ Can I use cleats instead of staples?
Yes! It supports both 15.5-gauge staples and 16-gauge cleats for flexibility.
Based on 0 reviews
Be the first to review “Ryobi Flooring Stapler”
Related products
-
ryobi power tools
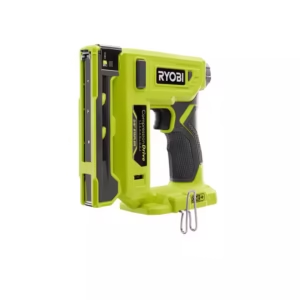
Ryobi Crown Stapler
The Ryobi Crown Stapler is a must-have tool for any professional contractor, DIY enthusiast, or hobbyist looking for performance, precision, and convenience. Whether you’re fastening upholstery, assembling wooden frames, or tackling general home repairs, the Ryobi Crown Stapler delivers reliable results every time. With Ryobi’s innovative design and cordless efficiency, it’s no surprise this crown stapler has become a go-to solution for users worldwide.
SKU: n/a -
ryobi power tools
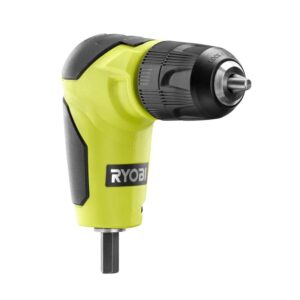
Ryobi Right-Angle Drill
If you’re looking for a reliable, compact, and affordable power tool to navigate those hard-to-reach areas, the Ryobi Right-Angle Drill should be your first choice. Whether you’re a professional contractor or a weekend DIY enthusiast, this drill stands out with its ergonomic design, powerful motor, and versatility.
SKU: n/a -
ryobi power tools
Ryobi Track Saw
If you’re into woodworking, cabinetry, or just serious about your DIY game, the Ryobi track saw is a tool that deserves your attention. Designed for precision, portability, and power, the Ryobi track saw combines the functionality of a table saw with the flexibility of a circular saw—without the bulk.
SKU: n/a -
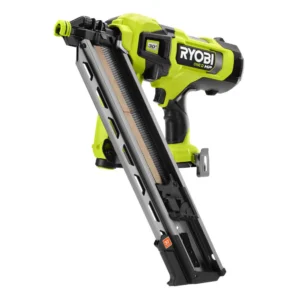
ryobi power tools
Ryobi Framing Nailer
If you’re a professional contractor or a dedicated DIY enthusiast, you know the value of a powerful, reliable framing nailer. When it comes to blending performance, durability, and affordability, the Ryobi Framing Nailer stands out as one of the best tools in the industry. Built to deliver high-powered nailing without the hassle of compressors or hoses, Ryobi’s cordless framing nailer is designed for efficient and precise framing, sheathing, fencing, and more.
SKU: n/a -
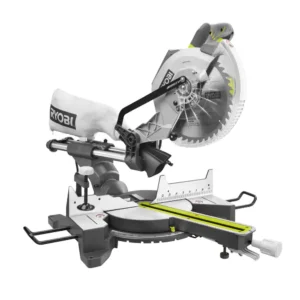
ryobi power tools
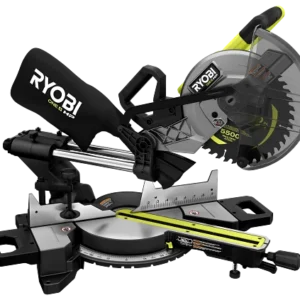
Ryobi Miter Saw
When it comes to precision woodworking tools, the Ryobi Miter Saw stands as a favorite among DIY enthusiasts, contractors, and carpenters alike. Known for combining high performance, portability, and affordability, Ryobi’s line of miter saws offers reliable cutting solutions for framing, trimming, molding, and other fine-finish carpentry jobs.
SKU: n/a
There are no reviews yet.